what i do in my spare time
every now and then i check out thinkgeek.com to see what fun, shiny things i would buy if i actually sold stuff on ebay. i will get a friggin shirt from there eventually, i swear. they sell a lot of stuff from penny arcade and they used to have a nifty blanket from megatokyo. amongst their wonderful geekery is das keyboard. i coveted that thing from the moment i saw it. what geek wouldn't want to display her prodigious typing skillz after she's used a computer day in day out for the past 15 years? i would have snapped one up but for the price: 80 skins. yeah, a blank black keyboard is cool and all, but to pay $80 for it? hell, i thought, i could make a keyboard like that.
...make a blank keyboard, you say?
like anyone wishing to take on a project, i turned to the internet. i quickly found this little tutorial on a site called sane asylum from a guy who had experienced the same indignance when faced with das keyboard's hefty price. being the pack rat that i am, i had an extra keyboard laying around that worked okay, except the spacebar is kinda jacked and leans to one side. perfect for experimentation.
i followed the steps as well as i could. i started out in summer of '05, i believe, then lost the verve and put it away for a while. lately i've been bit by the project bug again, so i dug the old beast out again and finished what little i had left to do tonight. behold, the final creation.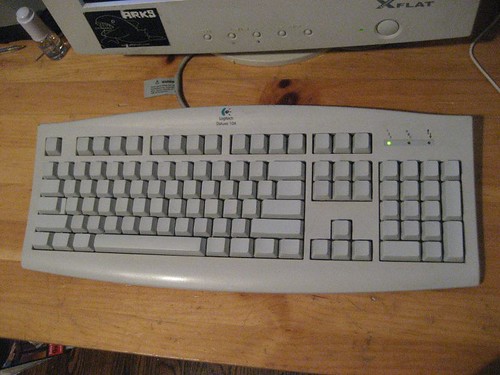
having done the entire tutorial, i'd like to review/simplify/decant it here:
1. clean. pry up all the keys with a flathead screwdriver (be careful with the big ones, there's probably something extra keeping them tethered) and clean it all out underneath, preferably with compressed air. wash the keys if you have to, i know i did. use gloves for all your tasks.
2. sand. 150 grit sandpaper works great. cut it up into strips and wrap it around a cylindrical object. i found a spray paint can worked best for me. caveat: you can't do this for any keys that have bumps, like F, J and 5 on the number pad. i accidentally sanded down my F key before i realized what i was doing. now i feel kind of lopsided. you also can't do this for big keys, like the space bar and backspace. you just have to sand evenly by hand and make sure to keep a smoothly curved surface. another thing: make sure to sand in whatever direction you want the end product to be in. i sanded my regular keys vertically and my space bar/ctrl/alt/etc keys horizontally. it was easier and it looks better.
3. smooth. here's where i differ from sane asylum, but only by circumstance. he advises 600 grit sandpaper to smooth out the roughness created by the heavy-duty second step, but even at the hardware store, the highest i could find was 320 grit. no matter, it worked fine.
4. shine. ultra fine steel wool put a nice gloss on the keys (that unfortunately is hard to show in pictures). i forwent the pliers and just held the keys in my hand, working them against the wool. easier to keep a straight line that way. the more shine, the more satiny and heavenly the keys feel as you type.
i'm really, really digging my new, fully-funtional toy. the keys feel extra nice in a way i've never noticed in a keyboard. i'm finding i still look to know what key i'm pressing, like in a cut/paste situation, but it's as if i instantly envision it in my mind anyway. my only regret is that i didn't practice on my lone black kb first, cuz that would have looked ultra sweet. but this way, i can mod it with paint or glaze and not have to worry about priming it. now i have the confidence to experiment with other keyboards for some antiquated steampunk effects... muahahah.
![]()

1 comment:
I remember thinking how awesome this was when I first saw the pictures on flickr...
You could really screw with some people by not filing down the "F" and "J" keys and moving them to, oh, "D" and "H".
That's my dorky thought of the day.
Post a Comment